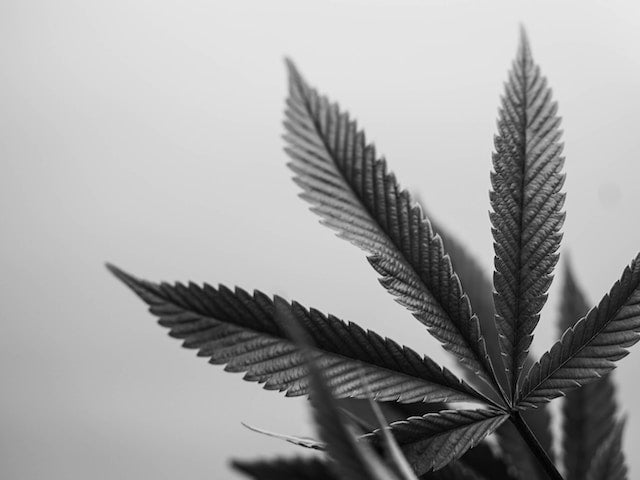
So you want to learn how to make a joint like a pro...
As any Star Wars fanatic would tell you, the rite of passage to becoming a Jedi Knight is constructing your own lightsaber; and for stoners, you have achieved ganja knight status when you master how to roll a joint! Anyone can pack a pinch of weed in a pipe or drop a dab into a bowl, but there’s more than a little artistry when it comes to learning how to roll a joint and smoke it the right way.
Expertise begins with simply knowing how to roll a joint the basic way, then perfecting your technique – your first few attempts may be sad and awkward, unsightly yet smokeable, maybe only slightly tubular; but practice does make perfect – or at least better. So, with some patience and a supply of weed and the right papers, you’ll be able to level up to advanced placement schooling in how to roll a small joint, how to roll a thin joint, how to roll a fat joint, how to roll a double joint, how to roll a cross joint, how to roll a cone joint, and how to roll a heart joint how to make a joint – some of these spliffs start looking like weedy origami after a while; that said, we’ll even show you how to roll a tulip joint! Don’t fret, however, no one has to attain joint Jedi Master class – but if that is indeed what you seek, then you can go full bore for cannabis contortionism; for those who are less gonzo and somewhat virginally weedy, it will likely be enough to learn how to roll a joint step-by-step for beginners. Whatever pot plateau of ability you aim for, if you follow along with our guide then before you know it, you will be mastering joint rolling techniques in no time!
Sure, there’s a lot of how-to’s, but relax! This isn’t a math quiz nor a college entrance exam and you’ll commit these things to memory by doing – if not then you can always bookmark this page and come back to it for reference. Weed should be fun and relaxing – that’s kinda the whole point, so let’s get into the nitty-gritty and the many variations on how to roll a joint!

Stuff You Probably Should Know Before You Learn How to Roll a Perfect Joint

(Joint and grinder, Hendertucky Marie on Instagram)
How Much Weed Does it Take to Roll a Joint?
How much weed you need for a joint is a little complicated because there are different-sized joints and different sizes of joint paper; giant j’s would have more weed, while smaller spliffs would contain less – that’s as basic as ganja science gets! Typically, for a standard, everyday joint the answer is at least half a gram, on up to 2 ½ grams or more for bodaciously big, badass blunts! Individual preference comes into play – some people like to roll a joint that's more bite-sized than others; while some cannabis consumers may prefer toking off a righteously huge reefer. At most legal US dispensaries a low-priced $7-$15 joint contains between .43g and .66g of pot. We say as long as you've got your favorite cannabis strain in there, you add however much you want - as long as you can still roll it, that is!

(Joint, rolling tray, and Accessories, image from NS Seaweed on Instagram)
Some Weedy Words You May Want to Know:
Adhesive strip – generally organic, vegan and non-GMO; this strip lies along the joint paper edge and is usually made from some kind of natural gum. You make the strip sticky by licking it with your tongue, and then you press the strip against the paper on the rolling sheet to glue it down.
Blunt – Famous in cannabis culture, a blunt is a cannabis cigar, sometimes made with actual tobacco leaf wraps from cigars that have had the tobacco core removed; sometimes larger joints are referred to as blunts, and these are also called fatties.
Crutch – the cardboard filter, usually handmade, for a joint. When you're joint rolling you'll need a crutch at one end of the joint. We'll talk more about this in the steps below for how to roll a joint.
Hemp wick - Made from hemp twine dipped in or otherwise coated in wax (typically beeswax); some cannabis users prefer this to a butane lighter for lighting pipes or joints because there are no butane fumes. Generally, you light one end of the hemp wick with your lighter, then put the burning hemp to your weed bowl or doobie tip.
Joint – A joint is a marijuana cigarette, a paper tube stuffed with weed, often tapered on one or both ends; also known as a j, a doobie, a spliff, a reefer and by a gazillion other nicknames too numerous to name them all. Learning how to roll a joint is a right of passage for all cannabis consumers - we're glad you've found us here to start practicing rolling techniques.
Leaf – a sheet of rolling paper. Joint rolling can't happen without a leaf of your favorite joint paper.
Rolling papers – Papers used to roll a joint started out as something specifically for hand-rolling cigarettes, but as weed became more and more popular there were soon specialty papers specifically made for joint rolling – Zig Zag is one such brand that has a reputation for being used chiefly for making joints, though they can be used with tobacco as well; RAW is another well-known brand for joint paper.
There are all kinds and different flavors of joint papers available. Some folks prefer hemp papers because they tend to be thin but strong, and offer an even burn without adversely affecting the flavor of your pot. The standard-size of joint paper, no matter what it's made of, is 68-70mm/2 ½ - 2 ¾ inches long by 34-36mm/1 1/3 – 1 ½ inches wide; king-size is 105-110mm/4 – 4 1/3 inches long by 42-46mm/1 ¾ inches wide.
|

RAW's King Size Set
is a must have for all - whether you're just learning how to roll a joint, or you're already a pro.
|

Be one with the elements when you roll using Elements rice paper sheets. These standard-sized papers are known for their smooth tokes and even burn.
|

Make sure you know exactly what you're inhaling with these Extra Wide Pure Hemp papers.
|
 |
|
|
Roach - the remains of the mouth/inhalation end of joint, blunt or roll-up cigarette after most of it has been smoked up; usually smoked using a tweezers-like device known as a roach clip. These are a great purchase, mostly because it ensures you get to enjoy every bit of whatever cannabis strain you're toking on without risking burning your fingers when the burn reaches the end of the joint.
|

|
Once you've mastered how to roll a joint, you now need to make sure you get to enjoy it down to its very, very end!
This adorable Narwhal Roach Clip will be there to keep you company while you do it!
|
Rolling Tray – A flat, portable surface that you can use to put your grinder, paper and weed on and use to roll your joint.
 |
To compliment your perfect joint rolling techniques, get this beautiful tray made of black walnut wood from Marley Natural.
No matter where you are in your "joint rolling" journey, this tray will be the perfect companion, there to catch any fallen herb so you can make sure you don't waste any!

|
How to Roll a Joint Easy
How to Roll a Joint with a Joint Roller:

(RAW rolling machine and papers, image from Marijuana Mal on Instagram)
Okay, among the simplest ways to roll a joint is to use a toker tool known as a rolling machine to roll it for you. There are just a few easy steps to follow; generally, it all goes well and you have a nearly-instant joint. These are a great option if you need to roll in a hurry, or maybe you've rolled so many joints that your index fingers hurt and you need a break! Who are we to judge? The point is - you've got options when it comes to learning how to roll a joint, and joint rollers are a great one!
Step 1: Begin by opening up the plastic rollers, putting in a filter, then sliding it over to one side.
Step 2: Put in about a half gram or more of the weed of your choice – a stimulating sativa, a relaxing indica, or a well-balanced hybrid – whatever cannabis strain you choose, we believe you can't go wrong. Make sure to do this over a paper towel, rolling tray or something to catch any spillage.
Step 3: To begin rolling, close up the plastic rollers again, then pick up the joint rolling machine and turn both rollers toward you; with your fingers, keep the plastic taut around the inside so the rollers get nice and tight.
Step 4: Now insert a single sheet of your favorite joint paper between the rollers, with the gummed side facing you. Because it’s so tight, you may have to work it in a little, but with patience and practice it will go in.
Step 5: Next, roll the paper in by turning the rollers towards you. Stop before rolling the paper all the way in – because you want a little sticking out so that you can lick the gummed strip on the edge.
Step 6: Once you have licked the adhesive strip, then roll it in the rest of the way, giving it a few more rolls.
Step 7: Open up the plastic rollers and remove the completed joint.
Step 8: Light it up and toke away!
This method make seem like the easiest way to roll a joint compared to the old school way of rolling with your hands, but joint rollers do actually take a little getting used to. The best way to roll the perfect joint with joint rollers though is, of course, to practice!
 |
Made from eco-friendly hemp plastic, this 2-way, adjustable roller from RAW is a great addition to any cannabis consumer's arsenal. Roll a joint in no time, no matter whether you're on the go or suffer from mobility issues.
|
And here is a handy instructional vid on how to roll a joint with a rolling machine:
Supplies for how to roll a joint:

Probably the most famous name in rolling papers is Zig Zag. Apparently, the inspiration for using rolling papers to begin with was a 19th-century French dude, known as Le Zouave, who broke his clay pipe and then had the brilliant idea to roll his tobacco in a piece of paper torn from a bag he was carrying; it is his likeness on all Zig Zag’s products – we honestly thought it was a hippy, but cool! Anyway, in 1879, brothers Maurice and Jacques Braunstein established a business in Paris to produce fine cigarette papers in flat booklets – and this and the rest, as they say, is history.
As interesting as all that is, what you need to know is that Zig Zag Kutcorners Rolling Papers are slow-burning papers designed to make it easier to roll by hand, though they work perfectly well in a rolling machine. The adhesive strip is made from natural Arabic gum, which sounds impressive! Altogether there are 32 leaves, or thin sheets of rolling paper, per pack.
You can order a pack of these rolling papers for $2.00 – and they offer free shipping on orders within the United States, with an average shipping time of only 2-3 business days!
What we love!
- Reputable historic brand name
- Slow-burning papers
- Designed to easily roll by hand, but work perfectly well in a rolling machine
- Adhesive strip is made from natural Arabic gum
- 32 leaves/rolling papers per pack


RAW rollers rock because they are made from uber-durable, specially-produced German Hemp Plastic, and they're a great option for those who need to roll on the go or find a way to accommodate a hand injury/pain. Other comparable rollers are usually made in China from lower-grade plastic and tend to break rather easily. But RAW’s manufacturing process uses a unique eco-friendly cold-injection process and their rolling aprons use double-thick vinyl with very high tensile strength, designed to last. And, in addition to being sturdy, RAW rolling machines produce reliably good joints.
This particular RAW roller is designed specifically to work with 1 1/4 rolling papers and can be had dirt cheap at $13.10.
What we love!
- Made from durable, specially-produced German Hemp Plastic
- RAW’s manufacturing process uses a unique eco-friendly cold-injection process
- RAW’s rolling aprons use double-thick vinyl with very high tensile strength, designed to last
- RAW rollers produce reliably good joints
- Designed specifically to work with 79mm (1 1/4) rolling papers
How to Pack a RAW Cone Joint:

(How to fill a RAW Cone joint, image from Cannalizious on Instagram)
First off, there are two different kinds of cone joints (because ‘why not’?) – pre-rolled cones and cones you roll yourself. Cones you roll yourself we’ll discuss later in the ‘How to Hand-Roll a Joint’ section – because this is the ‘easy’ section, we want to talk about filling pre-rolled cones. They're the surest bet to get the perfect cone shape! Some of the joints you get at your local dispensary or provisioning center are pre-rolled cones that they fill with weed; granted, because they are mass-producing these conical spliffs, they sometimes use joint filling machines – we are gonna presume your weed intake doesn’t necessitate a filling machine and we’ll go step-by-step on how to fill a premade joint cone.
Here we go:
Cone shape joint, Step 1: Make sure you finely grind your weed to ensure easy packing and better burning.
Step 2: Remove cone from package – they usually come in multi-packs of 6 or more – take just one out.
Step 3: Hold the empty cone by the smaller bottom end filter and scoop your shredded bud up from your grinder catch chamber with the larger open end. Hold the cone straight up and tap the filter/mouthpiece end of the joint on the surface of the table or tray where you are doing your filling to settle the ground ganja down into the narrow/filtered end. Don’t pack the weed in with a stick, so your herb remains loose. This will ensure a more even burn.
Step 4: Then, ‘nother scoop of weed, more tapping. Lather-rinse-repeat until the weed is all the way up to the wider/open top end.
Step 5: Pinch the top/open end together and then twist to close. The twisting will slightly compact the weed down inside, that and better burning is why you want to keep the weed loosely packed as you’re filling it.
Step 6: Smoke your joint by lighting the wick-like twisted paper and let it burn to the weed; now you can take a puff and toke down to stoner town.
Take a moment to watch this video on how to pack a RAW cone and you'll be the better for it:
Supplies:

As you just read above, filling a RAW Pre-rolled Cone is pretty fast and easy – yay! You can fit about a gram and a half of dried herb in one of these precision-crafted pre-rolled cones made from the same truly naturally unbleached paper as RAW King size Papers – plus they come with expertly fashioned paper filter tips. These 110mm premade paper cones are probably the fastest way to make joints from your own ground cannabis stash!
What we love!
- Amazingly easy to use
- 110mm long
- Made from the same truly naturally unbleached paper as RAW Classic Papers
- No need to cut up business cards as filters - each cone comes with an expertly fashioned paper filter tip
How to Roll a Joint with a Cigarette:

(Rolling a joint with a cigarette, image from Andrew J 420 on Instagram)
There’s actually two ways you could go about using a cigarette to roll a joint. One is to just wrap a rolling paper around the cigarette, using it as a guide, so that you can then moisten the adhesive gum strip, Then once it is sealed, slide the resultant tube off the cigarette, slide in your joint filter on one end of the joint, and then fill the newborn tube with weed. You could do similar with a pencil or a pen, too – using one of those in place of a cigarette.
Or, you can empty out a cigarette casing to then pack it with ground ganja. Who said learning how to roll a joint had to be difficult?
For the second method you will need:
- At least one cigarette of any brand or type to hollow out.
- Cannabis, weed, pot, marijuana - you know what we're on about
- The eraser side of a pencil, cotton swab, something to pack your weed in with
- Some tweezers to help pull out the tobacco
Step 1: Start by unpacking the cigarette paper casing. With your index finger and thumb, twirl the cigarette cylinder, squeezing slightly so that the tobacco begins to come out. Ground tobacco looks a bit like pencil shavings.
Continue to roll and pull slightly, forcing the tobacco up and out making sure the tube of the cigarette retains its cylinder shape and isn’t tearing. Remember to be somewhat gentle, because being too rough might bend the tube or rip the paper, if not now, possibly later. Use the tweezers to help pull out the tobacco once you get it near the open end of the tube. Once you look down inside the empty cigarette tube and see the white cotton filter, then you have emptied out all the tobacco.
Europeans have been known to leave in a little tobacco, mixing the tobacco and weed to make a spliff. On a somewhat – but not really – trivial note, a Jamaican spliff is just weed, whereas a European spliff is a mix of both weed and tobacco.
Step 2: When you have your cigarette tube ready to be refilled, grind your weed, grasshopper! Yue can use your grinder or a pair of scissors, but you have to make sure that your marijuana leaf is finely shredded so it’s easier to pack into the waiting joint paper tube.
Step 3: Once you have a sufficient amount of ground weed – likely less than a gram, it is time to take the ground weed and pack it into the former-cigarette tube. Take a pinch of weed with your fingers and place it in the opening of the now-empty paper tube, using your pencil eraser or cotton swab to push and pack the weed. Make it a fairly tight pack, but avoid ripping the paper.
Step 4: Once you only have a centimeter left of the cigarette tube at the open end, stop packing and twist the end tightly shut.
Step 5: That’s it – you’re ready to toke with a filtered joint or spliff.
Now, this lovely gal will review the same things we just went over with you on how to roll a joint with a cigarette in vid form:
How to Roll a Joint with a Swisher:

(Swisher joint or blunt, image from Weed Queen Val on Instagram)
This is more of a blunt than a joint, and we covered this in our blog on canna cigars, but here is the deal if you want to try to roll a joint with a Swisher:
All you need is some grinder-shredded ganja and a traditional store-bought cigar or cigarillo; some of the best cigarillos for weed include Swisher Sweets, Phillies, or Backwoods.
Step 1: Cut the Swisher – or other brand – lengthwise and remove the tobacco.
Step 2: Moisten the empty wrapper with some saliva or tap water.
Step 3: Fill the now-empty cigar or cigarillo wrapping with your freshly ground cannabis – for a standard-size cigarillo, one to two grams is all you will need. Have more handy if you have a bigger wrap.
Step 4: Roll the fresh ground weed between your fingers to pack your blunt evenly.
Step 5: Once it is packed and you’ve evenly shaped your blunt, just tuck the Swisher cigar or cigarillo wrapping under itself, wetting the inside of the exposed edge with saliva or water from one end to the other, using your fingertips to smooth out any wrinkles.
Step 6: Bake the blunt by running a lighter lengthwise back and forth along the seam, being careful not to hold the lighter too close — heating it only, not burning anything. You can use cannabis oil as cigar glue to make sure the seam is sealed.
And if you are dazed and confused by any of this info, then this ganja gal will help clear things up in her vid on how to roll a Swisher joint, or blunt:
How to Roll a Joint with a Clipper Lighter:

(Clipper Lighter and flint with packing tool, image from Smokea)
So, if you have a cone or a hollowed-out cigarette tube, you can use your Clipper lighter to tap down and pack the loose weed in either one because Clipper lighters come with an attachment for that very purpose – handy that! There is a multi-tool that you can access by pulling up on the lighter’s flint roller – the part that you flick when you ignite a lighter. The tool slides out and you can use it to tamp down the weed or roll a joint paper around it as a handy guide. That’s it – short, simple and to the point! Some people might prefer Bics over Clipper lighters, but to each his or her own and the hidden packing tool is a plus, especially for anyone who may need to roll on the go.
See what we mean in this video showcase about how to pack a joint with a Clipper lighter:
Supplies:
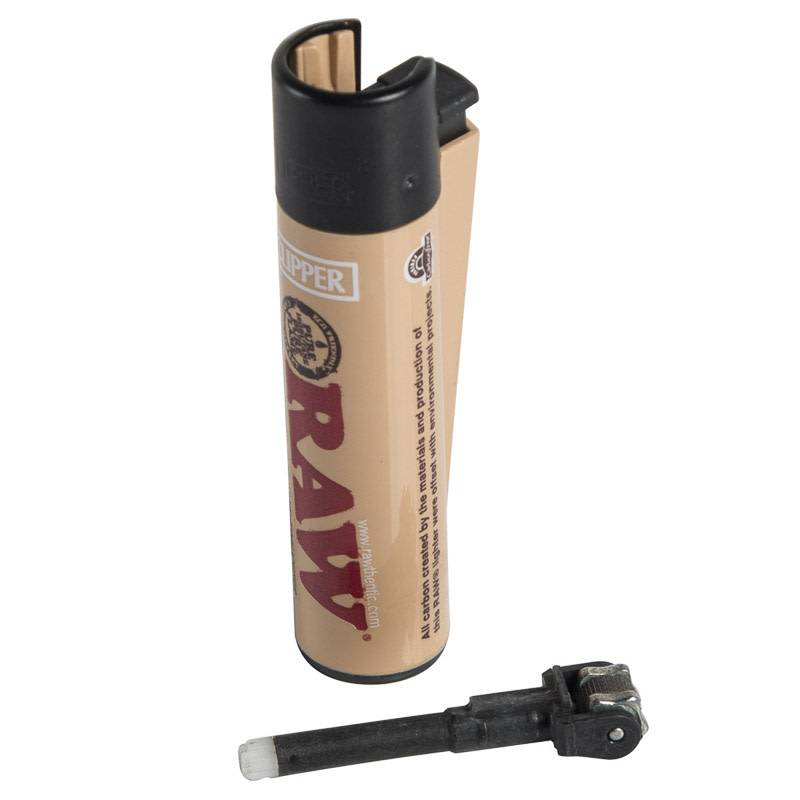
Clipper lighters are pretty popular lighters for weed aficionados! Clippers are famous for their reliability and quality; some folks prefer other brands - it’s like Apple computers versus PCs, you have ardent defenders of both!
Each Clipper tiny torch is made in Spain from a superior nylon material, stronger than the cheap plastic lesser brands use. This one boasts all kinds of fine features such as 3000 lights per each lighter, it also helpfully opens beverage cans with ease, has that integrated poker/packer that we told you about above and it’s refillable!
Two eco-friendly reasons to love Clipper lighters is that they have a high recycled content incorporated in each one and every time you refill you save many milliliters of butane over buying a new lighter.
If you want for yourself some versatility in a lighter, then we are gonna tell you how you can get yourself a RAW Clipper lighter: invest just $4.99 for an incredibly useful and durable refillable lighter, which they can ship to virtually any address in the world – some restrictions apply, because life is that way!
What we love!
- Clippers are famous for their reliability and quality
- 3000 lights per each lighter
- Helpfully opens beverage cans with ease
- Refillable
- High recycled content incorporated in each
- Integrated weed poker/packer
And, since we mentioned it above in the 'How to Roll a Joint with a Cigarette' section, here is How to Roll a Joint with a Pen:
Step 1: Wrap a rolling paper around the pen or pencil, until only the sticky adhesive strip of the paper is sticking up.
Step 2: Lick the sticky strip of the paper and seal the rolling paper around itself. Doing this now will ensure the paper keeps its cylinder shape.
Step 3: Slide the paper up so that only ¼-inch remains ensconced around the pen, and then load your well-shredded, freshly ground herb in from the open top end.
Step 4: Use a Clipper lighter packing tool, smaller pen, sucker stick, Q-tip or whatever to push the weed down inside; keep going until full and the joint is complete!
Step 5: Remove the pen, pinch the ends closed and twirl each. Now you have a joint ready for sparking!
How to Roll a Joint with a Dollar Bill:

(Rolling a joint with a dollar bill, image from Marijuana Metripolitan)
You are not smoking the dollar bill in this technique; it merely is a means to make rolling a joint easier. Obviously, the inks in a dollar bill would be toxic if you smoked it, but it does make a pretty handy substitute roller.
Step 1: Put your weed in the crease of a folded dollar bill and shape it by gently rolling back and forth.
Step 2: Then slide in whatever paper you're actually going to smoke, sticky side up, between your mix and the dollar bill.
Step 3: Refold the dollar bill, tuck your non-adhesive rolling paper edge over and under the weed, then roll upward with your thumbs. The rolling paper should begin wrapping around itself to form a cylinder shape.
Step 4: Remove paper tube from the dollar bill, holding with slight pressure on the paper so that it doesn't unravel.
Step 5: Lick the adhesive strip of the paper, press gently and seal the newly-formed joint.
Step 6: Finish by lightly twisting both ends to close.
Now, grab you some money and you can follow along with this video on how to roll a joint with a dollar bill:
How to Hand-Roll a Joint

(Hand rolling a joint, Image from Stocksy on Pintarest)
Okay, we’ve done the ‘How to Roll a Joint for Beginners’ section – the ‘How to Roll a Joint Easy’ or ‘How to Roll a Joint for Dummies’ methods using joint roller machines or premade cones – now are you ready for more intermediate level joint rolling? Prepare yourself as much as you are able, because now we are gonna get into hand rolling without a tool, no training wheels - this is the old school way; we will attempt to teach you how to roll a perfect joint step-by-step with just some kinda papers, your fingers, a few nugs of weed and, hopefully, the skill you develop as you practice packing pot into papers for the purpose of doing some puffing!
How to Roll a Joint By Hand - Basic:
Step 1: Grind your weed – either by hand or with scissors; this is always task one whenever you roll a joint, but since this is a step-by-step guide, we’ll keep including it.
Step 2: Create or insert your filter mouthpiece, also known as a crutch. This step is somewhat optional, and we’ll discuss how to roll a joint without a filter below. But if you want to know how to roll a filter for a joint, you merely take a small piece or strip of cardboard – a section of a business card will do, many joint papers will include crutch cardboard with their packaging. Whatever clean cardboard piece you use, start with three accordion folds at one end of the cardboard, rolling the rest of the unfolded filter around the folded end; when it’s finished, looking at it from on end, it should look like a "W" in a circle.
Step 3: Take a leaf from your pack of joint paper and you’ll probably notice a natural crease in it, which is handy to hold your cannabis. Pick up the paper by the end and begin to spread your weed evenly along the crease in the paper. If you made a crutch, or your papers came with premade filters, insert one at the end of the paper in the crease and hold it in place with your thumb while you fill the rest of the paper with the mulched marijuana.
Step 4: Gently roll the paper back and forth to evenly distribute the weed inside.
Step 5: Tuck the unglued side of the paper over the top and under the weed in the crease; then begin to roll the tucked side and weed inside towards the adhesive strip side of the paper until only the strip is left. Lick the seam with your tongue and press down, still rolling slightly, starting on the filtered end and working your way toward the open end.
Step 6: Twist or fold the open end closed, so no weed leaks out.
Step 7: Other than the smoking of the joint, that’s about it.
This may take a few attempts to get right, but it’s a time-honored technique that tokers have used to make themselves marijuana cigarettes, or reefers, for many, many years.
Here is comic actor and noted stoner Seth Rogen giving his take on how to roll a joint:
Now, let’s try some variations on your simple standard spliff.
How to Roll a Cone Joint with RAW or Zig Zag Papers:

(RAW Cone hand joint, image from Mr Weedoq, on Instagram)
Step 1: First, grind up some weed, 1 to 3 grams so you have plenty. Grinding weed is always step one.
Step 2: Lay out a rolling paper with the adhesive glue edge facing up and put your filter/crutch on one side along the crease.
Step 3: Now fill the crease with your shredded herb, putting smaller amounts near the filter and more and more as you move towards the opposite end. So your line of weed will be wider opposite the filter, narrower closer to the crutch tip, or tippy. The shape of the line of ground ganja helps shape the cone.
Step 4: Holding the pot-filled paper with both hands, thumbs at the front, fold the leading edge of the paper over and tuck it behind the weed, begin to roll. As you roll, there will be more paper to roll on the end with the filter tip, less paper to roll on the far end because of the shape of the green goodness inside; it will maybe look crooked to you but you’re probably fine, this is a cone – smaller on the bottom, but the paper is a rectangle; as long as your ends are even, you’re good.
Step 5: Lick the sticky top edge of the paper before you finish rolling so that the adhesive glues the joint closed as you roll. Use your fingers to smooth the sticky strip down as you finish your roll.
Step 6: Some weed may have fallen out, or you may decide there’s room for more, so you can pack a little more in the end if you feel the need. Use a nail or packing tool to poke the weed into the end joint and tap. Don’t over-pack.
Step 7: Leaving a small amount of empty space at the end of the joint, twist the end tightly to close off the open end. Squeeze this a bit and twist it so that no leaf falls out of the end.
That’s it, you now oughta have a cone joint to smoke and enjoy!
And a little video backup and review on how to roll a cone joint with RAW - or any other - rolling papers:
How to Roll a Joint with No Filter:

(No filter joint, image from Neko Stoner on Instagram)
Unsurprisingly, rolling a joint without a filter has much in common with rolling a joint that does have a filter. All you’ll need for this is some ground ganja, a rolling paper and something to tap the weed down into the paper cylinder. No need to worry about ripping up business cards or making accordion folds.
Step 1: Crease your paper if it doesn’t come pre-creased.
Step 2: Lay out your weed along the length of the paper. Youmay want to add a little extra for spillage - but you’re gonna want to make this one a little tighter than a filtered joint to help hold it together and to keep stray bits of weed out of your mouth.
Step 3: Roll the weed back and forth to even it out.
Step 4: And, as before, tuck the unglued side of the paper over the top and under the weed in the crease; then begin to tightly roll the tucked side and weed inside towards the adhesive strip side of the paper until only the strip is left. Also, just as you did with the filtered joint, lick the sticky seam with your tongue and press down, still rolling slightly, starting on one end and working towards the other.
Step 5: Here’s where things really differ from above, pick an end to be the mouthpiece end, where you’ll inhale from, and give that a half twist to narrow it but don’t close it all the way off (you’re going to need it somewhat open to draw air and burning weed fumes through) – you should still be able to see a little magic lettuce through the opening; the other end – the end you’ll set fire to with your lighter – you can twist a little tighter.
Step 6: Now you have a smokeable joint and when it burns down towards the end, you’ll have a little segment left that’s known as a roach. Some people keep a stash of roaches for hard times.
How to Roll a Tight Joint:
One of the ways you can learn how to roll a slow-burning joint – and consequently longer-lasting joint – is to roll it tightly. Rolling a tight joint isn’t a different kind of joint so much as a technique. So, whether you’re rolling a filterless or filtered joint, tight rolling is how you can achieve a little longevity with your doobie, Scoobie! Obviously, if you roll it too tightly it won’t burn, so it is a method that takes a bit of practice – like everything else, patience and practice will take you places in life and potentially improve your pot smoking, so keep that in mind.
Using a pen or pencil or even another joint as a guide to wrap your paper around is one technique you can use to roll a tight joint; you can wrap the paper tightly around the pen or whatever and then slide it out and pack in your weed with a tool to fill the joint. Again, pack tightly but not too tightly, something that will, again, take some practice. Using a crutch, or filter, to roll your joint also helps you make tighter joints because at least one end will be wrapped tightly around something solid. But mastering your rolling technique, so that the joint rolls up tightly, is key to reliably tight and slow-burning reefers.
How to Roll a Small Joint:

(Small joint, image from Indorshop on Instagram)
Some dispensaries sell what are called Mini J’s, pint-sized joints! The nice thing about tinier tokes is that they can help you micro-dose or manage your high. Plus, in some situations, like at a concert, you can smoke a smaller joint faster before anyone is the wiser – we’re not recommending that you do this necessarily, but it’s one reason smaller joints are popular.
One way to roll a smaller joint is to tear a third off the long, non-adhesive side of your rolling paper – then roll it up much thinner. That is also how to roll a skinny joint, too, come to think of it. Skinny joints are sometimes known as pinners or pin joints. So, a smaller joint could be skinny, either way you have less weed and a less intense high.
Another way to roll a small joint is to roll the joint using the smaller ends as sides; basically, you’re using the rolling papers sideways. Honey works as a makeshift adhesive, and you might want a little something else because the adhesive strip will be on the end and not along the side when using a rolling paper leaf sideways. Generally, just wetting the paper with your tongue should make it stick together – there are some joint aficionados who prefer adhesive-less wrappers and manage to get their joints to stay together with just spit alone.
These are two ways you could roll a smaller, more manageable marijuana cigarette.
How to Roll a Fat Joint:

(Fatty joint, image from Backyard Farmer 707 on Instagram)
Also known as a torch or a double-wide joint, this is the proverbial fatty – the big one, not for newbies, this is a serious amount of weed in one joint and will hit some people like a sledgehammer. Make sure you have a friend to smoke this with or have a comfy place to rest if you're attempting to smoke the whole thing on your own.
Step 1: For this you are gonna need two of your typical rolling papers; lick the adhesive strip on one so you can glue it to the non-gummed edge of the other, effectively joining the two rolling paper leaves into one that is twice as wide. Or, you can purchase double-wide rolling papers for the same purpose.
Step 2: When you make your crutch/filter you’re going to want that wider as well, not necessarily twice as wide but you do want a couple more folds in it to prevent weed from being pulled through from the wider joint. So you start with four or five accordion folds at one end of the cardboard you’re using for the filter mouthpiece, rolling the rest of the unfolded filter around the folded end.
Step 3: A double-wide joint can hold up to about three grams of weed – so it is a powerhouse. Hopefully, you remembered to grind up some weed as a preliminary step – if not, do so now, because you’re gonna be packing this bad boy next.
Step 4: Lay your crutch on one end of the double sheet and pile a row of weed pinches alongside across the paper to the other side – or pour the weed from the grinder in a line across the paper from the crutch to the other side.
Step 5: Pick up the joint-to-be by the filter end, holding the paper to the crutch so that you are supporting the weed with the cardboard crutch and paper.
Step 6: Rolling it all up is much the same as rolling a regular reefer. You start by rolling the paper back and forth to even out the weed inside. Then tuck the non-adhesive side of the paper over the top and under the weed wad in the middle; roll the tucked side and weed inside towards the remaining gummy strip on the far side of the second paper until only the strip is left sticking up. Obviously, this is much bigger and will be harder, maybe, to roll for you than a standard joint. So, we’ll remind you again that these things will take some practice to perfect.
Step 7: Lick the sticky strip with your tongue and press down, still rolling slightly, starting on the filtered and working your way toward the open end.
Step 8: Once your fatty is rolled and sealed, then twist the end to close.
Step 9: One last step is to roll a small crutch to slide into the larger one to ensure that you do not suck in any weed particulates when you toke down on this beast.
Now, we talked about premade cones above and obviously they do make monster-sized fatty pre-rolled cones (RAW makes cones up to 1 foot long) for rolling a fat joint, but where’s the artistry in that? At least try to roll a joint this way once or twice before breaking down and buying a premade cone for your thicker tokes.
Fatty fans of the world, rejoice - here is a video on how to roll a fat joint, so take a look and a toke:
How to Roll a Joint without Paper:

(Gum wrapper Joint, High School Stoner, on Instagram)
We intended this ‘How to Roll a Joint’ blog to be exhaustive, covering everything you could possibly want to know – fortunately we have plenty of weed for inspiration. Suppose you have yourself plenty of weed, but no papers and no quick way to get some – maybe you’re out of gas or it’s a zombie apocalypse outside; so, what can you use as a substitute for rolling papers in a pinch?
- Have you ever wondered how to roll a joint with a gum wrapper? Whether or not you have, we’re gonna tell you how you can use the silver foil sheets that sticks of gum come wrapped in for an emergency backup rolling paper. You have to try to rub the silvery stuff off the paper with a coin or spoon – smoking anything metal can mess up your lungs.
If you can get the silvery coating scrubbed from the paper, without tearing or shredding the paper, the sugary-gummy residue left on the other side of the paper should help stick it together when you lick it – gum adhesive from chewing gum powder.
- Use a corn husk – all-natural, soft, flexible and fibrous; if you live in the country, like in a farming community, they are literally everywhere; elsewise, city and suburb stoners may have some corn in the fridge, or you can get some from the store – though at that point you could also just buy another pack of rolling papers, which are usually sold anywhere that sells cigarettes and tobacco products. But yeah, you can use and safely smoke a corn husk.
- This one we cannot really recommend, but some say they know how to roll to a joint with Bible paper. Some inexpensive Bibles like you find in hotels and motels are made with really thin paper that is much like rolling paper material. However, you should consider that not only is it sacrilegious, but that paper also contains ink which is probably hazardous to inhale. Pretty much any printed paper would make a risky replacement for rolling papers because of inks or dyes.
Neither would we suggest learning how to roll a joint with printer paper – thicker-weight paper can make your smoking experience harsh; but if you wanted to cut off a rolling paper-sized piece of the printer paper that would be one way to potentially use printer paper as a substitute. Printer paper might make a better source material for making a crutch or filter than actually using it as burnable joint wraps.
You should also avoid looking into how to roll a joint with a receipt, or magazine page, or anything containing hazardous materials.
- This seems obvious, but smoke from something else… like a weed pipe, or even heat up knives and let your weed smolder in between while you breathe the fumes in through a straw. Or you could vape, dab, take a THC pill, some THC tincture or eat an edible.
So, did you think we were kidding when we told you how to roll a joint with gum paper - not so, check out this guy's video take on it:
How to Roll a Rose Joint:

(Rose joint, image from Deftones Junkie on Instagram)
Since we just discussed substitute rolling material for joints, one alternative is rose petals. Although roses don’t have ink like Bible papers or artificial chemicals like printer paper, you want to use organically grown roses if you are going to do this, as commercial roses could be sprayed with chemical fertilizers. Rolling papers and cannabis are known quantities, smoking everything else should be approached with caution.
That said, assuming you’re comfortable with rolling a joint with rose petals, we can tell you that the appeal for many people is that the petals look pretty, some really enjoy the taste and odor, and there is the essential oil aspect of rose purportedly being a good treatment for stress, anxiety, sleeplessness, menstrual cramps and pain and menopause symptoms – and since weed helps with most of those things, too, they ought to make a good combination.
So, what you will need is your usual weed ground up for making joints, you’ll also need some washed organic rose petals, a baking sheet, and your lighter. Your rose petals should be fresh, and you should trim off the hard base of the petal where petal connects to flower. Removing the thicker part of the petals should reduce any thick spots in the rose petal wrap.
Step 1: After washing the trimmed rose petals, dry them thoroughly – while also treating them delicately.
Step 2: Lay the petals out slightly spaced apart, flat with the round side up, edges down on the oven-safe cooking sheet.
Step 3: Put the pan with the petals in the oven, set on broil for around 10-15 seconds so that they wilt slightly.
Step 4: Take a couple of petals, lick or wet them with a damp paper towel half-way and press them together – depending on the size of the rosebud they’re from it may take two or three to fasten together to approximate the size of a standard rolling paper. You can add more petals for larger joints or blunts.
Step 5: Once you have the length you want, return the rose petal wrap to the oven for another 10-15 seconds on broil, drying and setting the wet petals – also, drying the petals will make for a better burn when you smoke your completed rose reefer.
Step 6: After you remove the rose wrap from the oven, you can now fill it with some of your ground weed and roll it like you would a joint or blunt made with rolling paper. For glue to hold it closed, you can use a couple of adhesive strips torn from regular wraps, sugar water, cigar/blunt glue purchased online or at a tobacco shop, or you can use some cannabis concentrate oil.
Step 7: Put your finished rose joint back in the oven for 10-15 seconds for one more dry and set; after you take it out for the final time, let it cool for 2-5 minutes. Now you can smoke it, happy trails!
Here is how to roll a rose joint for your special someone in video presentation form:
How to Roll a Dutch Joint (or How to Roll a Backwards Joint):

(Dutch joint, or backwards joint, image from Legalized Patient on Instagram)
A Dutch joint can be a couple of different things: one is a joint that mixes tobacco with weed (which we don’t personally recommend because tobacco is a known carcinogen) and the other is the ‘backwards joint’ kind of Dutch joint – which we are going to give you another step-by-step guide to rolling.
Step 1: Lay your rolling paper flat, with the sticky strip facing down.
Step 2: Next, place your filter at one end and put your mulched marijuana mixture in the crease. If there’s no crease, make one by folding the paper in half and then unfolding it again and laying it flat.
At this point, some people sprinkle in some tobacco with the weed, that is up to you. That is how to roll a slow-burning joint, other than just packing your weed tighter.
Step 3: Pick the paper up with both hands and roll the paper back and forth to shift and even out your grass clippings.
Step 4: Once the weed is evenly distributed, carefully roll the glue strip down to the edge of the pot potpourri, then tuck the paper in with your finger and begin to roll upward, pinching the paper to the crutch and rolling into a cone or cylinder, carefully making sure that the paper isn't creased.
Step 5: With one layer of paper covering the upward-facing adhesive strip, lick the glue through the paper, pressing softly with your fingers along the sealant strip for a tight glue bond.
Step 6: Once sealed, you can firmly but carefully squeeze along the joint with your fingertips to even out the shape.
Step 7: Remove excess paper by ripping it gently upward along the sticky strip – or carefully cutting with a scissors, making sure not to unseal the adhesive.
Step 8: Twist the top end closed and you are go for smoking down with your Dutch joint-rolling self!
If you're all turned around and confused about how to roll a backwards joint, or Dutch joint, then maybe this vid will help clear it up for you:
How to Roll a Boat Joint:
Step 1: Grind some weed.
Step 2: Make a crutch/filter like you have for every other filtered joint.
Step 3: This is where it gets a little different. You’re going to take a corner of your rolling paper and twist it tightly. If you do it right, the rolling paper now has a boat shape.
Step 4: Start filling your boat with weed starting from the twisted side and working towards the opposite, open end where you will put your filter.
Step 5: Set the filter in the open end, tuck over the unsticky side like you have done before and begin rolling the weed and paper as you have with previous joints – with both hands, pressing and rolling, until only the adhesive strip remains; lick the gummed edge and finish rolling so that it glues the joint together.
Step 6: When you are done, the boat joint will look like a standard joint, the ‘boat’ in the name refers to how you start rolling, not the finished product.
Step 7: And this is the best part, where you actually smoke the boat joint.
How to Roll a Hash Joint:
We wanted to throw this one in because it isn’t a style of joint, nothing fancy or complicated like in the next section, rather it’s just including some cut up or pulled apart chunks of hash in with your crushed and shredded cannabis when you roll a joint. We’d recommend using hash in a smaller to standard-sized joint, just because hash is a concentrate and hella strong!
You could also call this ‘How to Roll a Kief Joint’ or ‘How to Roll a Joint with Wax’ – or concentrates or whatever. Mixing weed leaf with other forms of weed is cool and isn’t dependent on how you roll your joint, so you could just as easily add hash to your marijuana in a pre-rolled cone, or in a Swisher blunt; some folks like to seal their joints with cannabis oil or melted weed wax, that is chill as well. Just be sure you know what you are getting yourself into and proceed cautiously, maybe taking a couple of puffs of your hash joint and then leaving off for an hour or more so that you don’t get over-high, shaky, nauseous or paranoid – we’ve been there and it isn’t fun, it so isn’t fun! Otherwise, have at!
How to Roll a Joint of the Stylin’ Super-Badass Likes
This is where things get fancy and potentially more complicated – this is the advanced placement stuff, so hopefully you’ve mastered some of the more basic ‘How to Roll a Perfect Joint’ techniques or watched some of the ‘How to Roll a Joint’ videos because those methods will also come into play in these groovier doobies.
How to Roll a Double Joint:

(Double or Shotgun joint, image from X of RM on Instagram)
There’s a couple of different ways to roll what some term a double joint. One is to just roll a fatty joint like we outlined above. The other is to roll a shotgun joint, there you lay two pre-rolled joints side by side on a rolling paper, and wrap the paper around both joints, making sure the filter ends stay even and then you smoke them that way, lighting both inner joints and pulling through both crutches at the same time.
One other way to roll a joint that is sure to impress is as follows:
Step 2: Then you use scissors to poke a hole in the middle of the long crutch, into which you insert a regular sized crutch and then you wrap another adhesive strip where the base meets the side of the longer crutch.
Step 3: Then on both ends of the longer crutch you roll standard joints with rolling papers so that you end up with a T-shaped crutch with joints on either side.
Step 4: Light the tips of each joint and smoke from the middle. Boom – double joint!
And boom again - here is a vid about how to roll a double joint:
How to Roll a Cross Joint (or How to Roll a T Joint):

(Cross joint, image from Weed Smoker 420 on Instagram)
Okay, some people get confused – it’s an occupational hazard with stoners. The alternate name for a cross joint is a T (as in shaped like a lowercase letter t) joint – now some people mix up T joints with tea joints. Tea joints are a thing, but they involve people smoking actual tea, as in the beverage, and that is a potentially very bad idea, so we are not going to teach you how to roll a tea joint, but we are going to help you learn how to roll a T joint, as in a cross joint.
How to roll a joint shaped like a cross or t:
Step 1: For the umpteen gazillionth time, make sure to grind your weed. Grind enough for a fatty, or jumbo joint, and a smaller, thinner joint – at least a quarter ounce.
Step 2: Now you are going to need some extra adhesive strips taken from papers, and then you’ll want to roll a fatty, or larger joint, plus a pinner, or small, thinner joint – both joint types that we discussed above. So, get yourself some ground weed, a big fat joint, and a small skinny joint – once that’s done, return here.
Step 3: Twist both ends of the smaller joint (which needs no filter).
Step 4: Twist closed the non-filtered end of the bigger, fatty joint if you haven’t done so previously.
Step 5: Pick a spot in the fatty that can accommodate the width of the skinnier joint, because it will be going through.
Step 6: Use a pin or a nail to poke a hole all the way through the fatty where the pinner joint will cross it. Widen the hole enough that the thinner joint will fit into it snuggly.
Step 7: Poke a hole through the skinnier joint – this will eventually line up inside the fatter joint – aligned from tip to end – so that the smoke can pass through from the tip of the larger reefer, through the skinnier cross joint, and down into the mouthpiece.
Step 8: Push and rotate the pinner joint into and through the fatty so that it extends all the way through and then pull and rotate it so that it sticks out evenly on either side. Again, the holes in the skinny cross joint should face the opposing ends of the fatty – face the burning end and the filter tip.
Step 9: Use the extra adhesive strips to secure the two joints together, wrapping them around where the two joints intersect in an x pattern.
Step 10: Now that all is secure, it is time to smoke this cross joint, or T joint, that you have made. Spark the twisted end on the fat joint, take your puff from the filtered end, then light the twisted ends of the thin cross joint, and with all three ends now lit, just keep smoking and toking away!
Were you expecting a video on how to roll a cross joint? Well, here it is:
How to Roll a Tulip Joint:

(Tulip joint, image from The Real Bean 420 on Instagram)
For this one you’re gonna want to grind a bit more weed than your standard joint – probably at least as much as you did for the cross joint, or T joint, above. You’ll need king-sized rolling papers for the flower; you can use king-sized papers on the stem, too. One other important ingredient will be a roll of hemp wick or hemp twine.
Step 1: Roll a regular joint for the stem. Cone or cylinder, it’s up to you. Leave the end opposite the filter/crutch open.
Step 2: Now to start rolling the flower, take two of your king-size rolling papers, lick one of the adhesive edges, and glue the papers together — making a large square from the two rolling paper leaves.
Step 3: Take the square corner opposite the remaining sticky edge and fold it down until a triangle form.
Step 4: Moisten the gummed edge, and glue the triangle together. The pointy tip should be sealed securely, the side opposite the tip will be open.
Step 5: Fill the tulip cone, lightly packing down the herb as you do so.
Step 6: Once the tulip cone is fully packed, place the joint you rolled previously for the stem into open end of the tulip; wrap any excess paper around the stem, twisting it to secure.
Step 7: Wrap the hemp wick around the excess paper to solidly attach the tulip to the stem.
Step 8: After that, all that’s left to do is blaze by lighting the pointy end of the tulip flower and inhaling from the filter tip on the regular joint; use your two lips to toke down on this weedy tulip!
Get your hot, fresh vid on how to roll a tulip joint right here:
How to Roll a Heart Joint:

(Heart joint, image from Maryjane_ Diary on Instagram)
You’re going to want to have on hand:
- At least a quarter-ounce of weed
- A half-dozen king-sized papers to roll with
- Many extra sticky strips torn from extra rolling papers (like, 10 or more of them)
- 3 filters/crutches – premade or made by you
- Scissors
Step 1: Yeah, grind your weed.
Step 2: Snip the sticky strips off some extra rolling papers so you have three to work with.
Step 3: Roll a couple of basic king-sized joints with filters - rip that business card and make some accordion folds if you don't have actual filters. Make them tight. Leave the ends opposite the filter open.
Step 4: Now roll two more basic king-sized joints without filters. These should be open on both ends.
Step 5: Insert the unfiltered joints into the open ends of the filtered joints.
Step 6: Wrap one of your extra adhesive strips around the seam where each of the unfiltered and filtered joints connect.
Step 7: Roll a filtered cone joint (instructions for filtered, unfiltered and cone joints are all above). Twist closed the tip of the cone.
Step 8: Carefully bend and twist the two joined joint sections into arched canes.
Step 9: Use your extra adhesive strips to attach all three joints together at the filter tip ends; the cone goes in the middle and the doubled-up, longer joints will be to either side of the cone. Weave an additional gummy strip or two around the base to make sure there are no leaks – leaks mean you get less cannabis-filled smoke and that would be sad!
Step 10: Sticky-strip wrap the two arched ends together around their tips.
Step 11: Now join the arched ends to the end of the cone with the extra adhesive strips.
Step 12: Und now ve smokes it, ya? Light the end of the cone and the end of the arches. Pull from the joined filtered tips and ruminate on how much you love weed as the high from your heart-shaped joint settles in. Is life good? Oh, yes – life is good!
Aiight, we got one more of these fancy joints left in us, here goes…
How to Roll a Braided Joint:

(Braided joint, image from Kaita Suka on Instagram)
Okay, let’s do this!
You are gonna need:
- No less than 2 grams of mulched marijuana
- 3 king-sized rolling papers – plus a couple extras to remove the sticky strip from
- 3 filter tips/crutches – premade or yours
- Scissors
Step 1: Roll yourself three regular joints complete with filters using your king-sized rolling papers. These joints you wanna roll on the thin side, and not too tightly because you’re gonna be twisting them around one another.
Step 2: Okay, now to prepare for the braiding – this is where the fun begins! Take your personal pack of rolling papers and remove a glue strip from an extra paper. Join together the three individual joints into a triangular shape – viewed end on – with two reefers at the bottom corners and the top corner joint resting between the two. Make sure the tips are all even. Wrap the glue strip around the filtered ends of the 3 rolled joints, lashing them together.
Step 3: Cut or tear off another glue strip from an extra rolling paper to bind your twisty joint after braiding. If you’ve ever braided hair, this will work similarly; if not, chill, we will walk you through it.
Once you’ve secured the tips, with the joints facing you vertically, think of the top one as joint number one, and the bottom left as number two, and the bottom right as three. To start braiding use the following pattern: cross joint number one over joint number two, then cross joint number three over joint one, cross two over three, then back to one over two, three over one, two over three and so forth until they are all braided. Obviously, this may take some practice to master, but it can be done! You might want to practice this with some string or someone’s long hair first.
Step 4: To finish up your braided joint you have to wrap your moistened adhesive strip around the middle to secure the trio there; and then twist to bind the combined non-filtered ends together, much like you would a standard joint. Once you have done that, your braided joint is ready to blaze, just light the combined end and puff the good stuff – times three!
Let's twist again and review much of the same info we just gave you in this video on how to roll a braided joint:
How to Roll and Smoke a Joint

(Smoking a joint, image from Jess Andrea on Instagram)
So, you’ve just been shown how to roll a joint of just about every type known to mankind… well, no, there are all kinds of variations – joint windmills, joint sharks, joint planes, joint Spider-man, but the ones we’ve given you are the most popular, and we’ve given you a step-by-step guide on how to roll each of the joints we’ve discussed.
Joints are marijuana cigarettes, technically, and they require, at minimum, some papers to roll your precious herb up into and a quantity of shredded weed; usually joints are rolled as cylinders or cones. Even the more artsy joints tend to be made from cylinders and cones. Gummed adhesive strips are what holds most joints together – it becomes sticky when you lick it and then tapes the rolling paper to itself or another rolling paper. So that’s the basics of how to roll a joint, but what about how to smoke a joint?
Seems like it would be simple enough: light, puff, and pass (usually on the left-hand side) – unless you’re smoking solo, then it’s just light and puff. And generally, it is that simple, but there are a few things to keep in mind:
- When you light your joint, rotate it so that the entire cylinder ignites evenly, at the same time – this should produce a reddish glow called a cherry and, if you do so, your joint should burn pretty smoothly and evenly. Elsewise, you could canoe your joint, meaning it might burn unevenly.
- Don’t put the joint all the way in your mouth, just rest the very tip on your lips so it doesn’t get all slobbery, wet and disgusting.
- Your hits should be small when you inhale to avoid the dreaded lung-busting coughing fit – the quality of your weed can have an effect, too.
- When crutchless joints burn down small enough they become a roach, you may want to use a tweezer-like device called a roach clip to keep you from burning your fingers and lips off.
In order to help you learn how to roll and smoke your own joints, we’ve showcased a few accessories you’ll want to buy to be able to roll your own joints – papers, cones, rolling machines, lighters with built-in tools; but one thing that you might need to complete your cannabis toking apprenticeship is a complete rolling kit. Let’s showcase one of those so that you know what we’re talking about, shall we?

The only thing that this awesome kit doesn’t come with is actual weed; sadly, that is sold separately. But it does have everything else that you need to roll a basic joint, so it has that going for it. You get a whole slew of rolling goodies, making it easier to roll a joint. We also love the hard shell travel case it comes with, which gives you safety of mind knowing you can roll a joint on the go and all of your precious materials will be safe. This may not be enough material to build one of the fancier tulip, heart or twisted joints, but it will get you started practicing how to roll a joint of a more normal fashion.
Should you decide to get all of your joint rolling supplies in one kit, then this collection will cost you just over $20. A wise investment in your mastery of all things joint rolling.
This bundle includes:
- RAW Pre-Roll Wallet
- Hippie Butler Rolling Paper Size Grinder Card
- RAW Natural Unrefined 1 1/4 papers
- RAW Hemp Plastic Roller - 79mm
- RAW Unbleached Roll-up Tips
- RAW Hemp Wick that's 10ft/3meters long
And now that you are supplied up and ready to roll, and because we know that you have always wanted to know how to roll a joint like Wiz Khalifa, here is a vid on exactly that:

(Various kinds of joints, Artxst Keena on Instagram)
Summary of how to roll a joint like a pro:
At this point, if you haven’t grasped how to roll a basic joint, then there’s no hope for you! Just kidding, rolling a joint isn’t easy for everyone, lots of cannabis consumers have a hard time learning how to roll a joint at first, but it is a skill that all cannabis completists should at least try once in their weedy life. With patience and practice, you should be able to learn how to roll a perfect joint… or at least how to roll a joint that's smokable. The point of this step-by-step guide on how to roll a joint was to expose you to the rolling techniques used by tons of tokers to roll up splendiferous smokes. That’s why we started with a ‘How to Roll a Joint for Dummies’ (no offense) beginner section and worked our way up to more and more complex methods of how to roll a joint.
Between ‘How to Roll a Joint for Beginners’ and ‘How to Roll a Braided Joint’ we wanted to show you how to roll a joint with and without papers, how to roll a joint with and without a filter; as well as explaining ‘How to Roll a Fat Joint’, ‘How to Roll a Tight Joint’, ‘How to Roll a Cone Joint with RAW Papers’ and a whole bunch of other ‘How To’s’! There are a lot of variations on how different people roll their pot; some people want to know how to roll a joint with a roller, while others prefer learning how to roll a joint by hand. Some folks are content knowing how to roll a small joint, yet others want to meet the challenge of rolling a big joint, or fatty – or maybe they’re interested in how to back roll a joint. We did cover how to roll a rose joint, using petals instead of papers, but we did not get into how to roll a tea joint – instead we did discuss how to roll a t-joint as in ‘How to Roll a Cross Joint’. So, there was some stoner schooling on a wide range of joint styles and complexities.
If an overindulgence of ganja makes you forget, and you can’t remember much more than how to roll a joint - even a basic one, or how to roll a joint with a pen, then fret not because you can always bookmark this ultimate guide on ‘How to Roll a Joint Like a Pro’ and come back to it again and again whenever you want to refresh your memory on things like ‘How to Roll a Tulip Joint’ or ‘How to Roll a Joint with a Swisher’ or ‘How to Roll a Joint with No Filter’ – or even how to roll a joint filter. Over time, these things will stick in your brain and you’ll be wowing your friends and family with your impressive joint rolling skills. With some mulched marijuana and a stack of rolling papers, using the reefer recipes we have given you, you should be able to go from beginner-level joints to advanced origami spliffs that are as beautiful to look at as they are sublime to smoke down on. So, roll, roll, roll your weed, gently on your tray, merrily, merrily, merrily, merrily – life is but a dream!
.
 Written by Megan Medeiros (BA)
Megan Medeiros has a bachelor’s degree in English and is currently working on a master’s in English at James Madison University. She's the owner and operator of Medeiros Writing, and has been working as a cannabis writer for the past three years, mostly following the legal climate of marijuana, especially in areas like California, Colorado, Oregon, Canada, and other legal areas.
This post contains references to products from one or more of our advertisers. We may receive compensation when you click on links to those products. For an explanation of our Advertising Policy, visit this page. All photos were sourced from Pinterest.com | updated 2021